
I'm so happy to be here!
Thanks Kami for this amazing opportunity to sponsor
and guest post on your blog.
It's my very first time that I'm doing a guest blog,
so bare with me...
Today I want to show you how to make
this cute little Felt Bunny Hair Clip.
A great gift for Easter!

The materials that you're going to need are:
- A template (if you search the internet you can find plenty of those). You can make it in any form that you like. I've made some that look like bunnies and one as a duck.
- Pieces of felt in any color you prefer. You can also use scraps because you won't need a big piece anyway.
- Yarn or thread and needle.
- Metallic hair clips
- Polyfill or even cotton balls
- Ribbon in a different or matching color.
- Hot glue gun, for making things quicker.

First of all, fold the piece of felt or use two pieces of scrap
and pin your template in place.
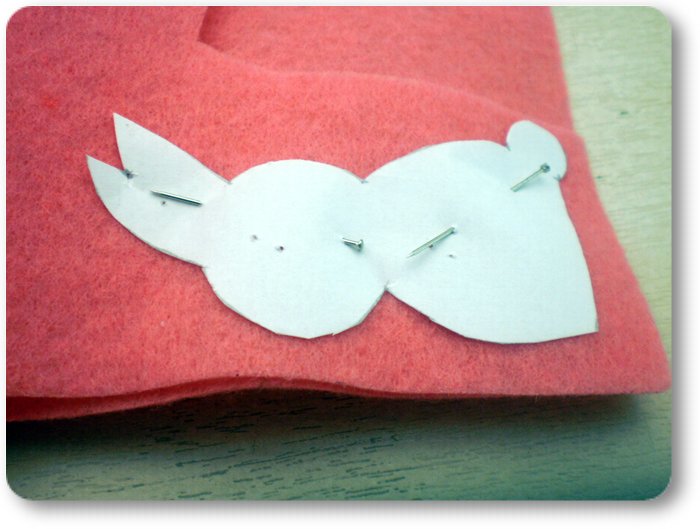
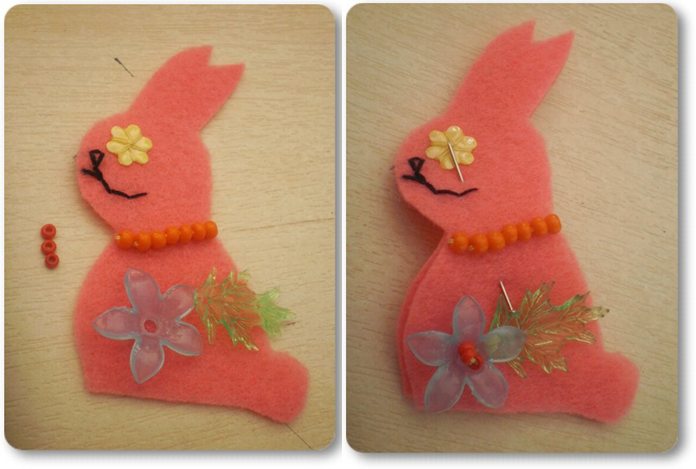
with anything you like,
beads, sequins, buttons, whatever you have laying around.

With some thread you can also stitch the nose and the mouth.
When you're done, pin the two pieces together so
that they'll stay in place as you stitch them together.

Blanket stitch around your bunny.
Before you reach the end, start filling it up
with polyfill or cotton balls.
You can use a chopstick, the back of a pencil
or even a paper clip so that you can push the filling to the edges.
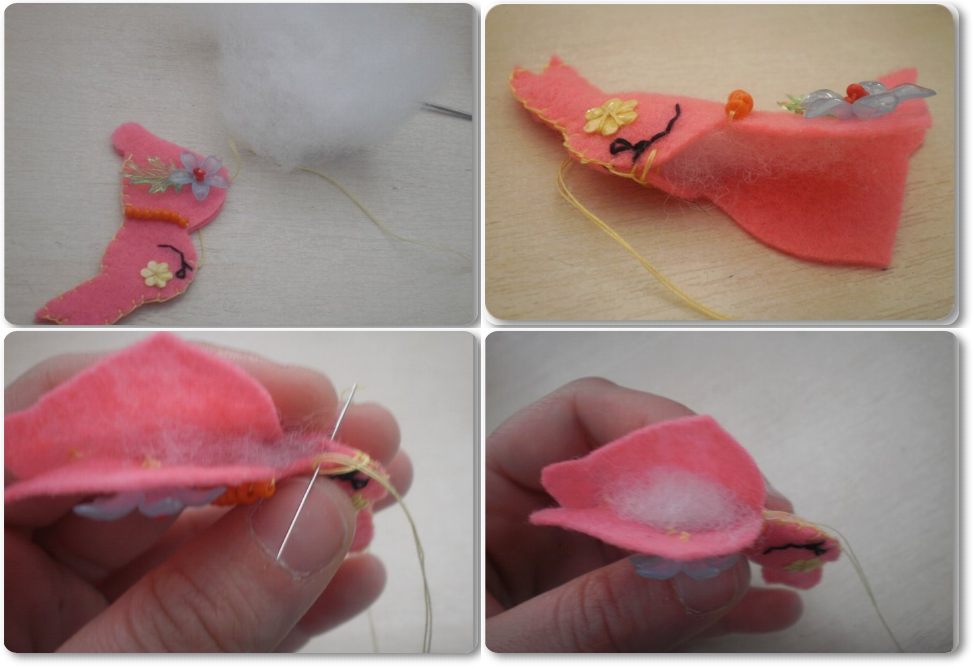
Finish it up!

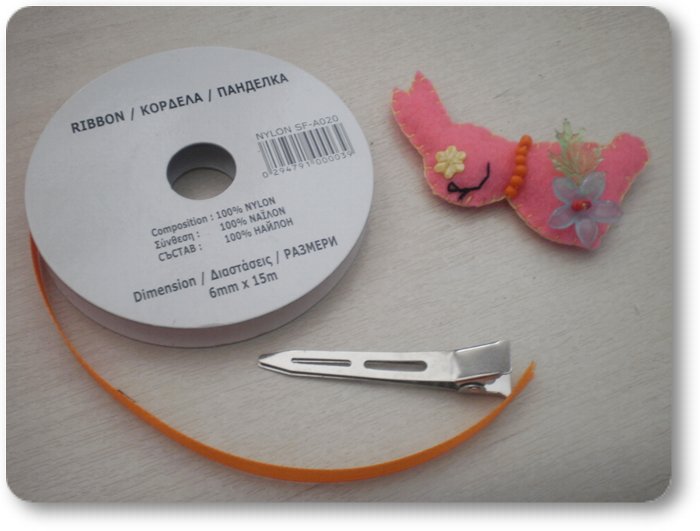
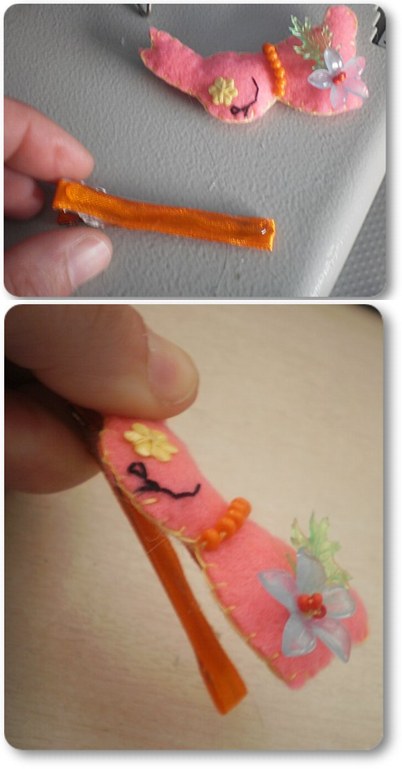
Now, for the hair clip all you need is a simple metallic hair clip
and some ribbon in any color you prefer.
The good thing about this project is that you can
"play" with colors and make any combination that you like.
It's up to you!
With your hot glue gun, start from the inner bottom
of the hair clip and start gluing the ribbon as you go.
You want to cover the whole hair clip around
so that the edges of the ribbon start and end inside.

Put some glue on top of the hair clip and
secure your bunny in place.
Your new Felt Bunny Hair Clip is ready to be worn!
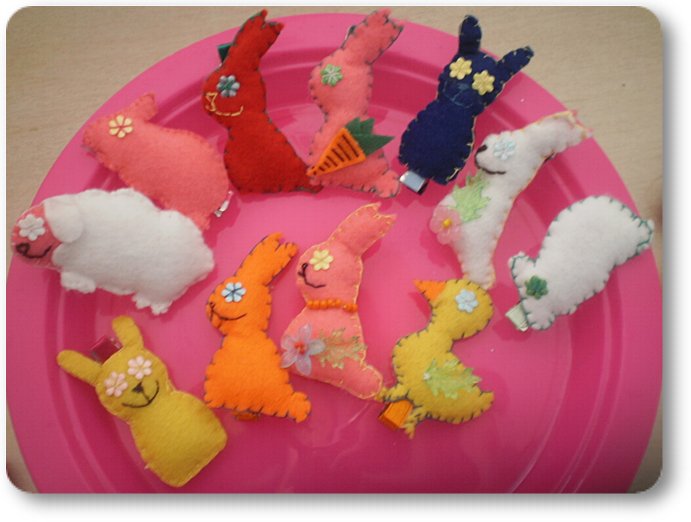
You can make as many as you want to
and give them as gifts to little ones,
add them in their Easter baskets or even organize
a Easter Hair Clip "Treasure Hunt" with
hidden little creatures all over the place!
I hope that you enjoyed my little tutorial and
if you make anything like this I'd love to see it!
Thanks again Kami for your hospitality!
Have A Lovely Day everyone!
BONUS!!!!!!! Anzouya also has a giveaway item for you all up for grabs...this adorable handmade Bunny Basket!!!!!!
 |
| http://anzouyaspool.blogspot.com/ |
4 Ways To Enter:
1. Follow this blog and Anzouya's blog for 1 point
2. Leave a comment on here telling me your favorite childhood Easter memory for 1 point
3. Mention this contest on Facebook or Twitter for 1 more point
4. TWO BIG FAT BONUS POINTS if you blog about it and link back!
Thanks Kami for having me! I hope your readers will enjoy my little tutorial!
ReplyDeleteHappy Easter to everyone! :-)
fun tutorial, thanks for sharing!
ReplyDeleteI love the basket!!!! Adorable!
ReplyDeleteCount me in. I already follow you and Anzouya, but I will also post it on facebook xxx
ReplyDeletewhat a cute basket!! count me in! im following both ! xo
ReplyDeleteAnzouya is so amazing, it's like she's creating pretty things non-stop. I love her and her cute collection of bunnies.
ReplyDeletefollowing both blogs
ReplyDeletewicked_sister69@hotmail.com
My fav childhood easter memory is defo rolling hard boiled eggs in the back garden with my mum. We did it with my nephews on sunday and it was muchos fun, totally brought it all back.
ReplyDeletewicked_sister69@hotmail.com
Tweeted!
ReplyDeletehttp://twitter.com/#!/wickedsister69/status/62841083251531776
wicked_sister69@hotmail.com